
Cost-Optimizing CI/CD Pipelines (Gitlab Runners, Jenkins Jobs, & GitHub Actions) with Spot-Integrated ASGs
The ability to deliver high-quality code quickly and reliably is crucial to stay competitive. This is where CI/CD (Continuous Integration and Continuous Deployment/Delivery) environments come into play. CI/CD pipelines automate the integration and deployment of code, enabling teams to push code changes more frequently, accerate collaboration, and maintain high standards of code quality.
In CI/CD environments, the need to scale runners and jobs quickly and cost-effectively is crucial, especially when dealing with large codebases or high-frequency deployments.
Today we will look at the popular CI/CD tools GitLab Runners, Jenkins and GitHub Actions. We’ll discuss how you can dramatically reduce compute costs by leveraging AWS Auto Scaling and Spot. And, we’ll show you how easy it is to optimize workloads for performance and price using nOps Compute Copilot.
GitLab Runners, Jenkins Jobs and GitHub Runners


GitLab Runners
GitLab Runners are lightweight, agent-like processes that execute jobs defined in GitLab CI/CD pipelines. They can run on various environments, including Docker containers, virtual machines, and Kubernetes clusters. GitLab Runners are highly flexible and support parallel execution, making them suitable for automated testing, building, and deploying applications directly from GitLab repositories.
Jenkins Jobs
Jenkins Jobs are tasks that Jenkins automates, such as building code, running tests, and deploying applications. Jenkins is an open-source automation server that allows you to create complex CI/CD pipelines through its extensive plugin ecosystem. Jobs can be configured in various ways, including Freestyle projects, Pipeline scripts (using Groovy), or Declarative Pipelines. Jenkins is highly customizable and can integrate with almost any tool, making it a popular choice for complex CI/CD workflows.
GitHub Runners
GitHub Runners are the underlying agents that execute jobs defined in GitHub Actions workflows. These runners can be hosted by GitHub or self-hosted in your own environment. GitHub Runners support a wide range of environments, including different operating systems and containers, allowing you to automate CI/CD tasks directly from your GitHub repository. GitHub Actions seamlessly integrate with the GitHub ecosystem, making it easy to trigger workflows based on events like code pushes or pull requests.
Key Differences and Use Cases
| GitLab Runners | Jenkins Jobs | GitHub Runners | |
| Integration & Ecosystem | GitLab | Jenkins | GitHub Actions |
| Flexibility & Customization | Flexible with built-in support for Docker, VMs, and Kubernetes, but customization is typically focused within the GitLab environment | Extremely customizable due to plugin architecture, supporting almost any CI/CD need, making it a go-to choice for complex / non-standard workflows | Highly flexible within the GitHub Actions framework, with extensive support for Docker and other environments, but less customizable outside of GitHub’s integrated workflows |
| Ease of Use | Easy to set up for teams using GitLab | Steeper learning curve due to extensive configuration options and plugin management | Easy setup and management within GitHub |
| Typical Use Case | GitLab users needing CI/CD automation tightly integrated within their repositories, e.g. automated testing, building, deploying apps | Organizations with complex CI/CD needs, multi-repo projects, or legacy systems requiring integration with various tools & services | Teams that want to automate workflows directly from GitHub e.g. CI/CD, code linting, security checks, automated deployments triggered by repository events |
Integrating GitLab Runners, Jenkins Jobs, and GitHub Runners with AWS Auto Scaling
Integrating GitLab Runners, Jenkins Jobs, and GitHub Runners with AWS Auto Scaling can enhance the scalability and efficiency of your CI/CD pipelines, allowing these services to dynamically adjust compute resources based on workload demand. This increases both cost-efficiency and performance.
Here are some approaches for integrating each service with AWS Auto Scaling.
1. GitLab Runners with AWS Auto Scaling
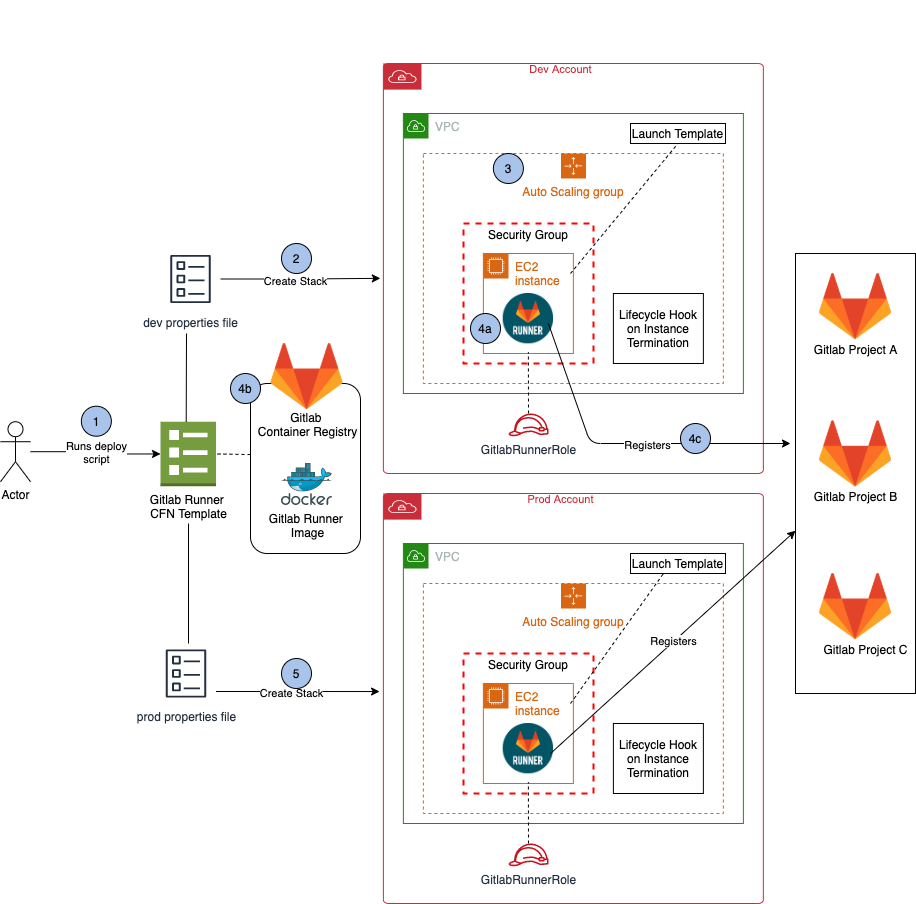
There are different ways to deploy your GitLab Runners to the Cloud. The official GitLab Doc suggests manually building the Docker image, deploying it to ECR, creating the GitLab Runner instance manually and orchestrating it through the AWS ECS. While this approach is highly customizable, it’s very complicated and requires a lot of steps.
Luckily, there’s a more convenient way to deploy your GitLab Runners to AWS AutoScaling, in fact, this approach even has some features that improves Jobs reliability and cost efficiency out-of-the-box — it’s an open source Terraform module that can automatically integrate your GitLab Runners to your AWS AutoScalingGroups. This allows your ASGs to run Spot Instances and attaches LifeCycle Hooks to ensure less frequent Job failures, while saving you up to 90% of EC2 Compute Cost Spend.
Integration Steps:
1. Clone the repository:
bash git clone https://github.com/cattle-ops/terraform-aws-gitlab-runner.git cd terraform-aws-gitlab-runner2. Select one of the available examples
bash cd examples/runner-default3. Create a `terraform.tfvars` file and set the following params there:
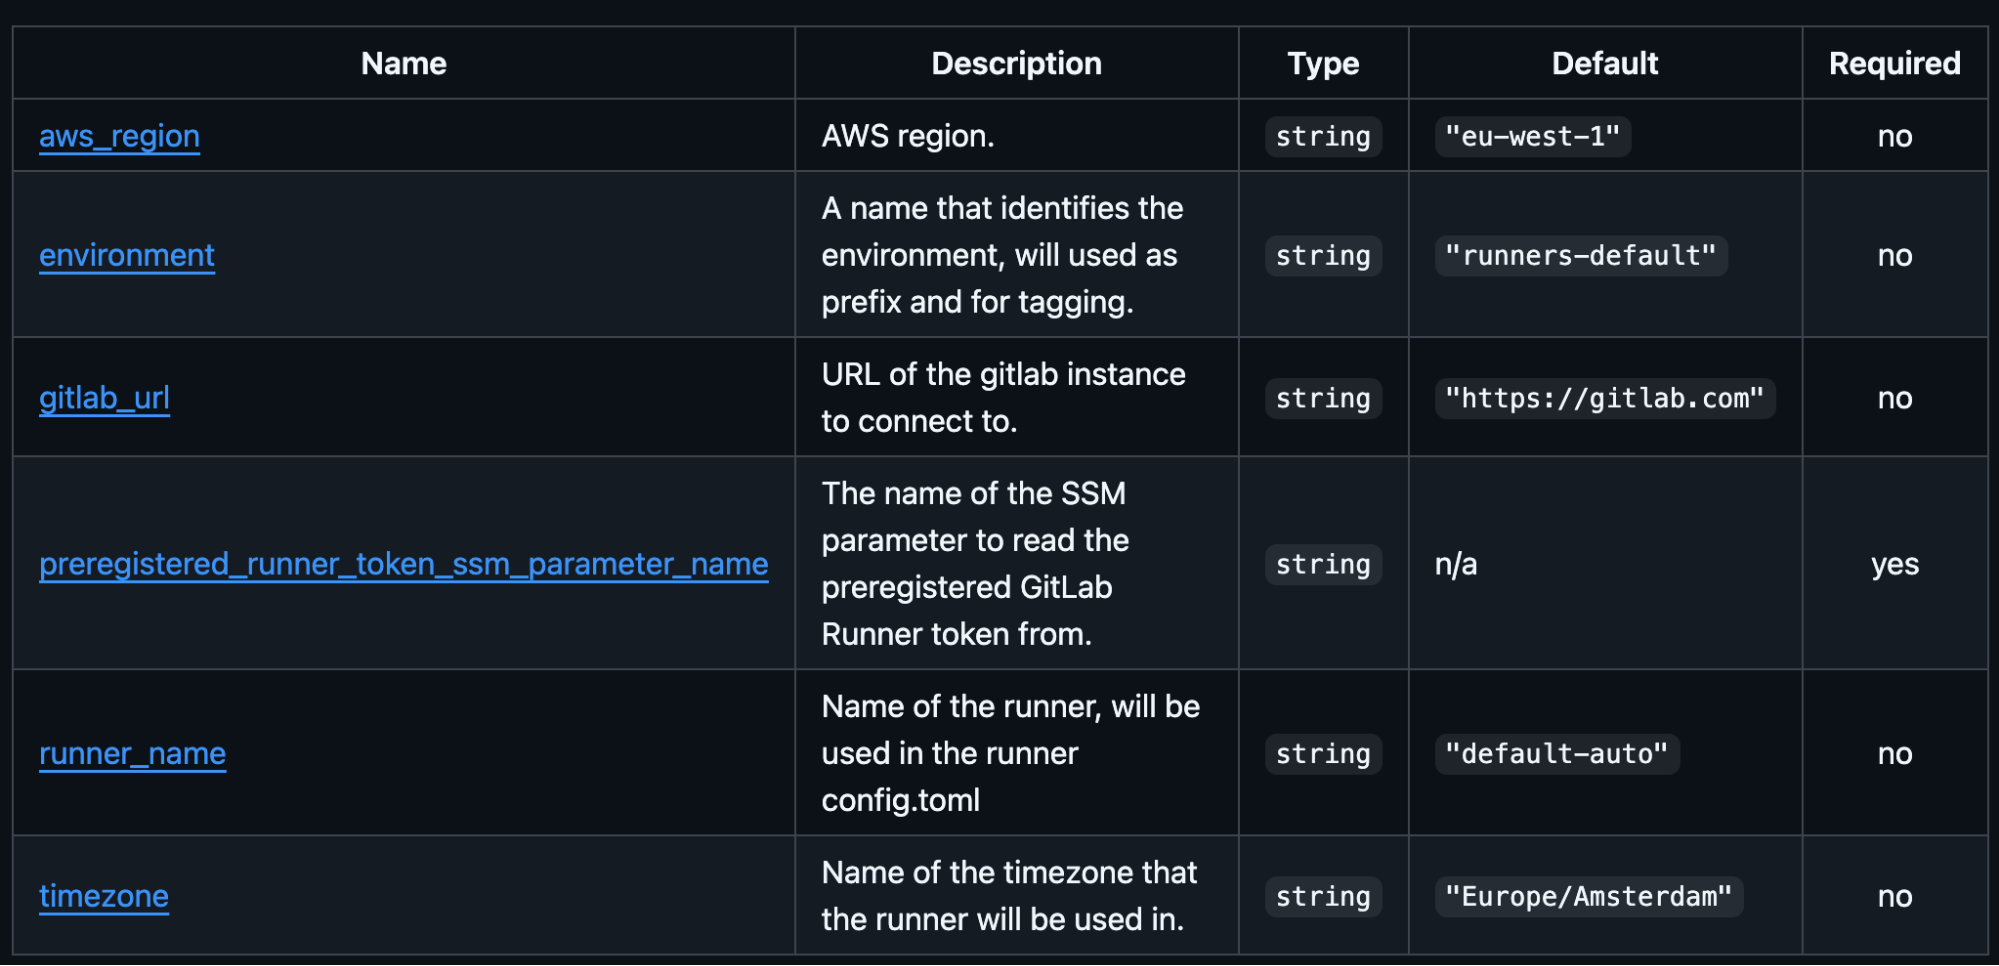
4. The only required param is `preregistered_runner_token_ssm_parameter_name` – it stores the GitLab Runner registration token in the AWS SSM Parameters Store. Here’s how it’s generated:
- Go to your GitLab project https://gitlab.com/YOUR_GROUP/YOUR_PROJECT_NAME/-/settings/ci_cd
b. Expand the “Runners”
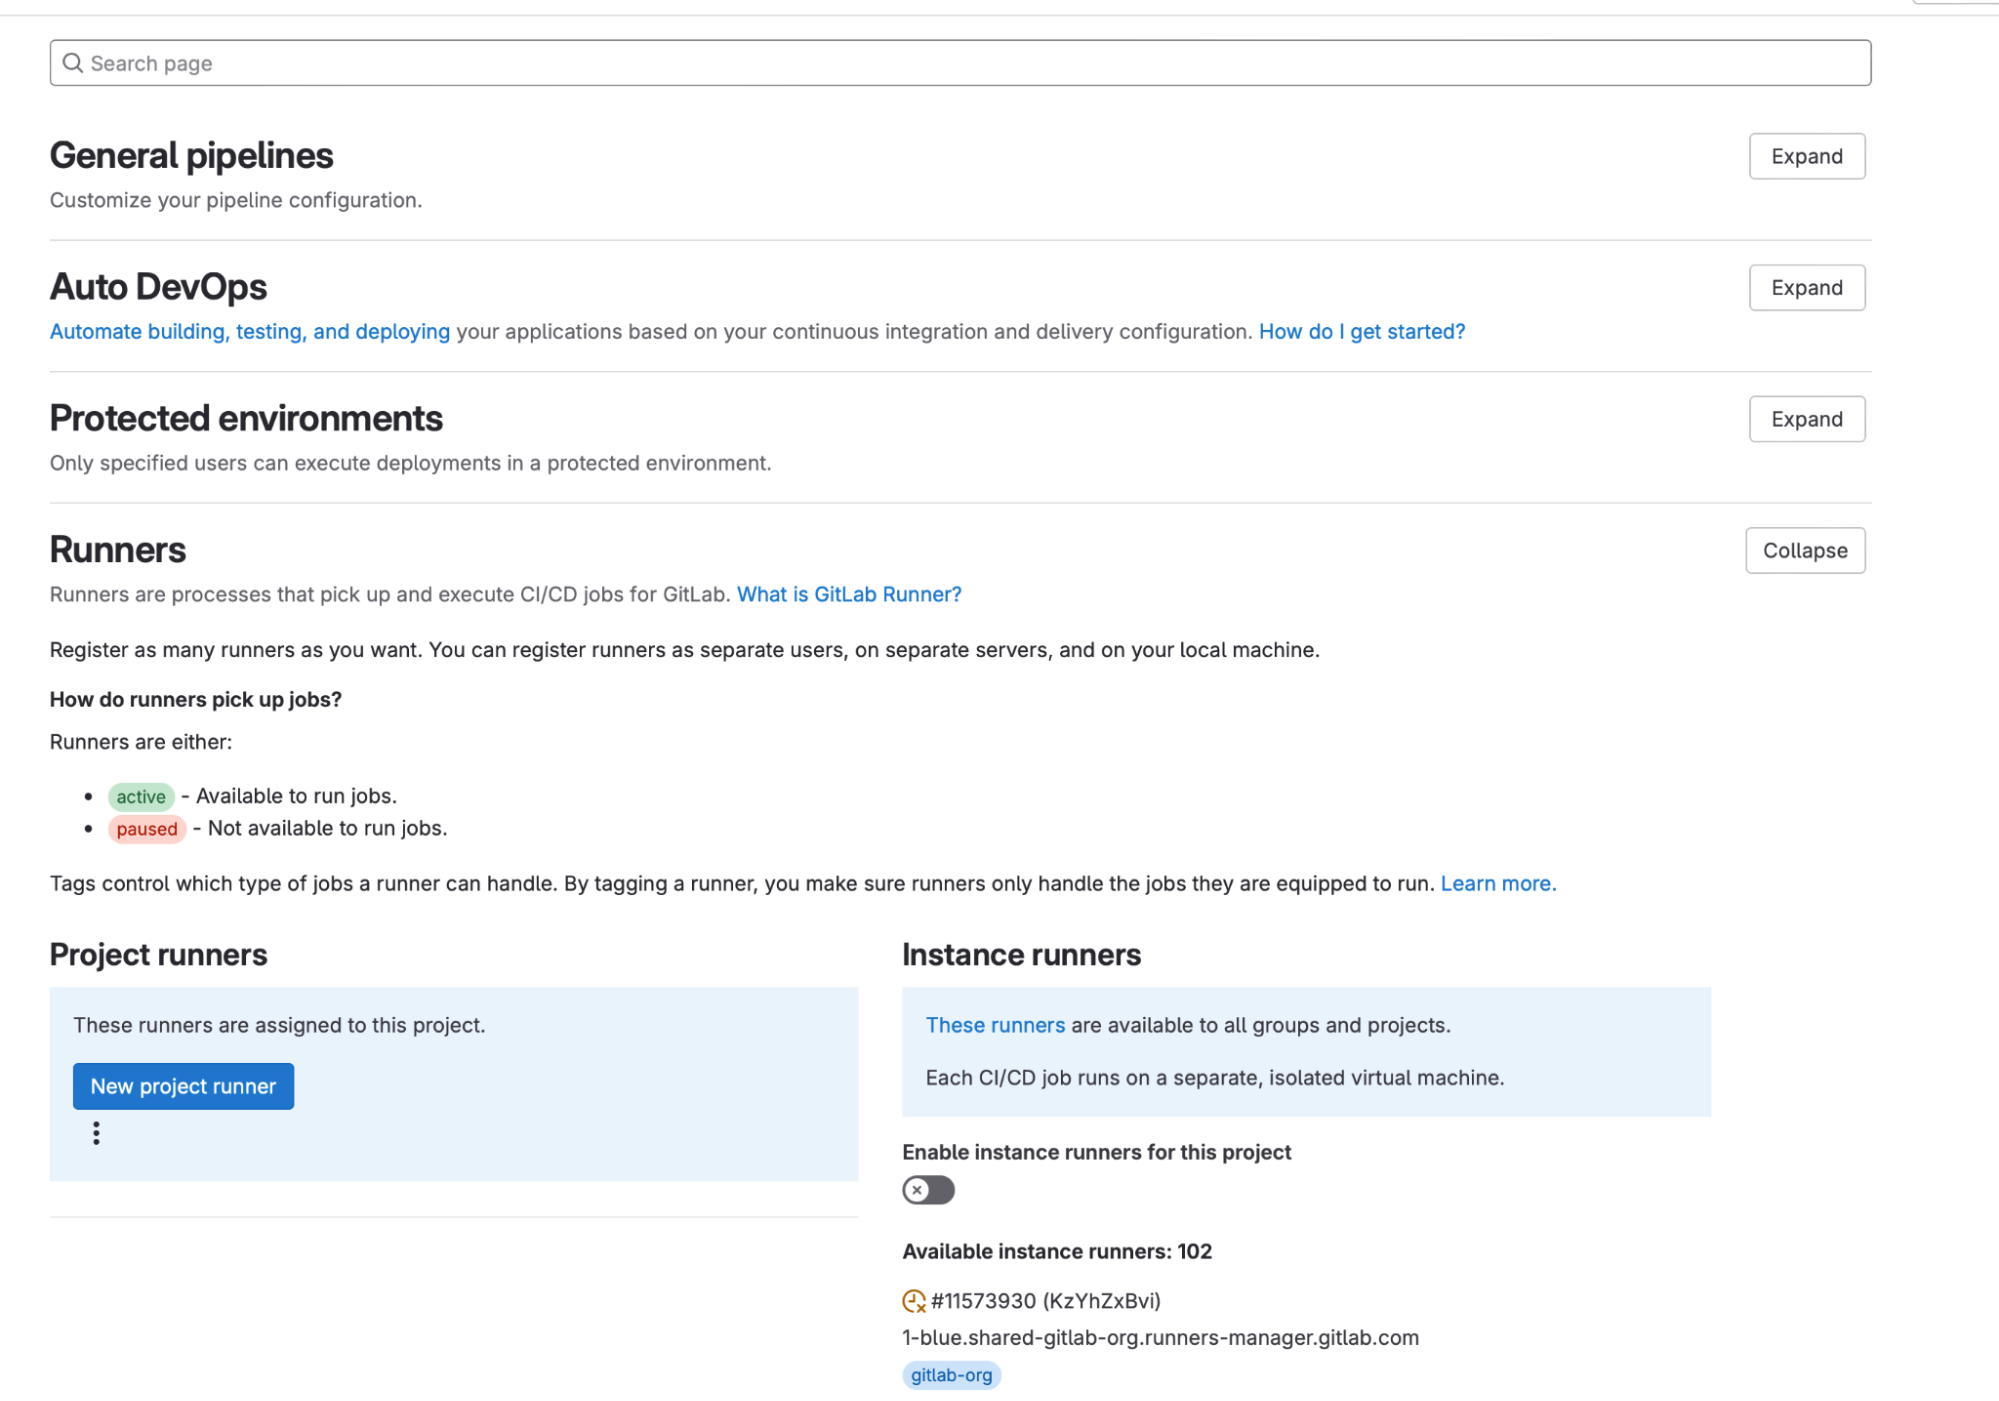
c. Click “New Project Runner” button to enter the Runner creation screen
d. Specify the tags this Runner will trigger the jobs for or select “Run untagged jobs” for it to run all Jobs
e. Click “Create Runner”
f. Copy the runner authentication token(glrt–zHkxVkb2***********)
5. After creating the SSM Param Store Value with the runner authentication token obtained in the step above, you can apply the Terraform:
bash terraform init terraform apply6. You should see the following response in your terminal indicating that all resources were successfully
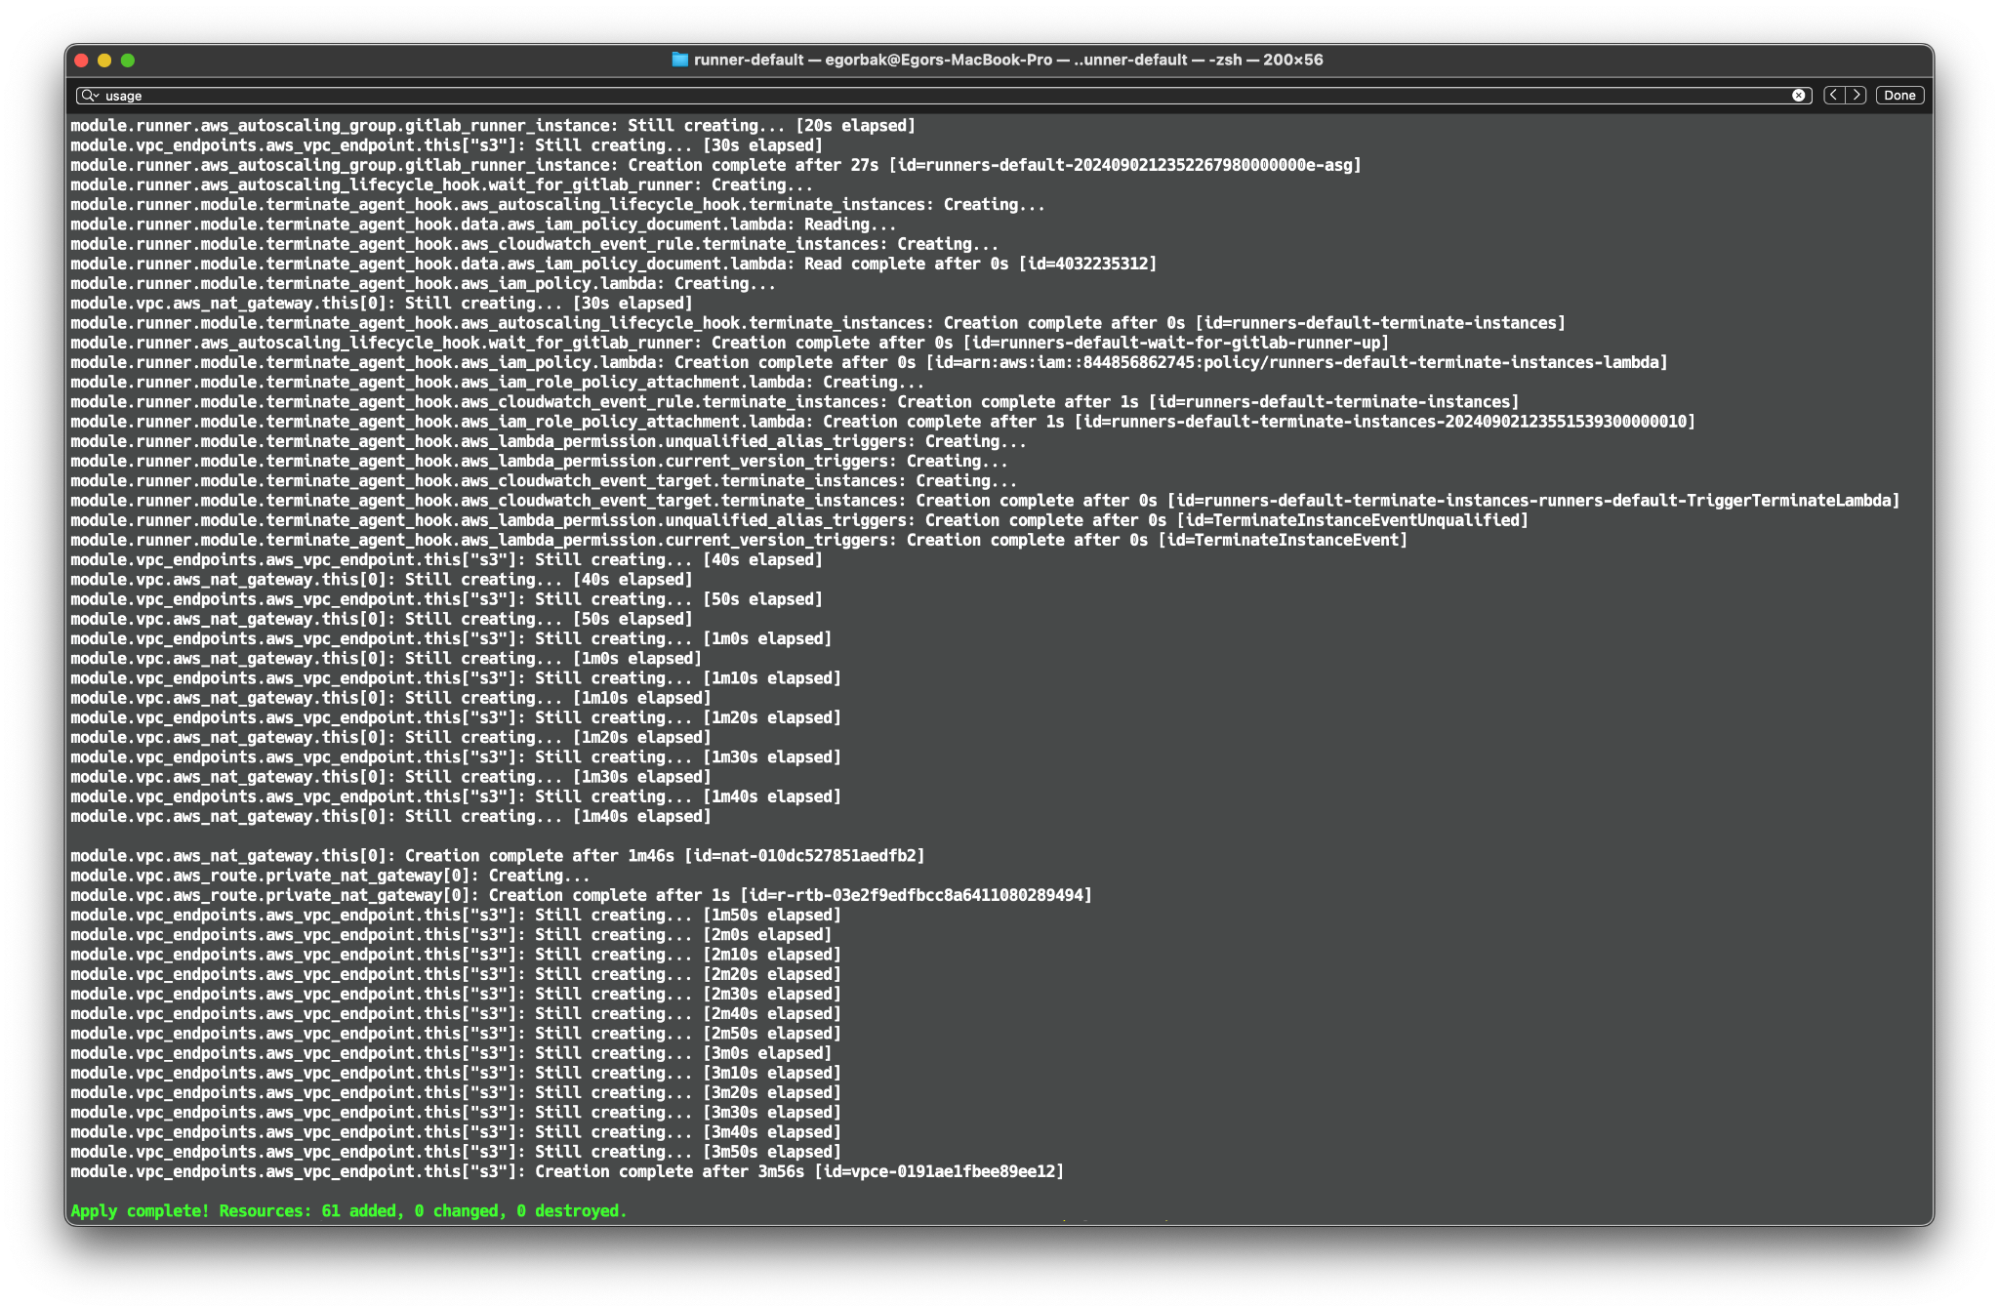
created
You should see an AWS Auto Scaling Group created that will serve the incoming GitLab CI/CD
jobs:
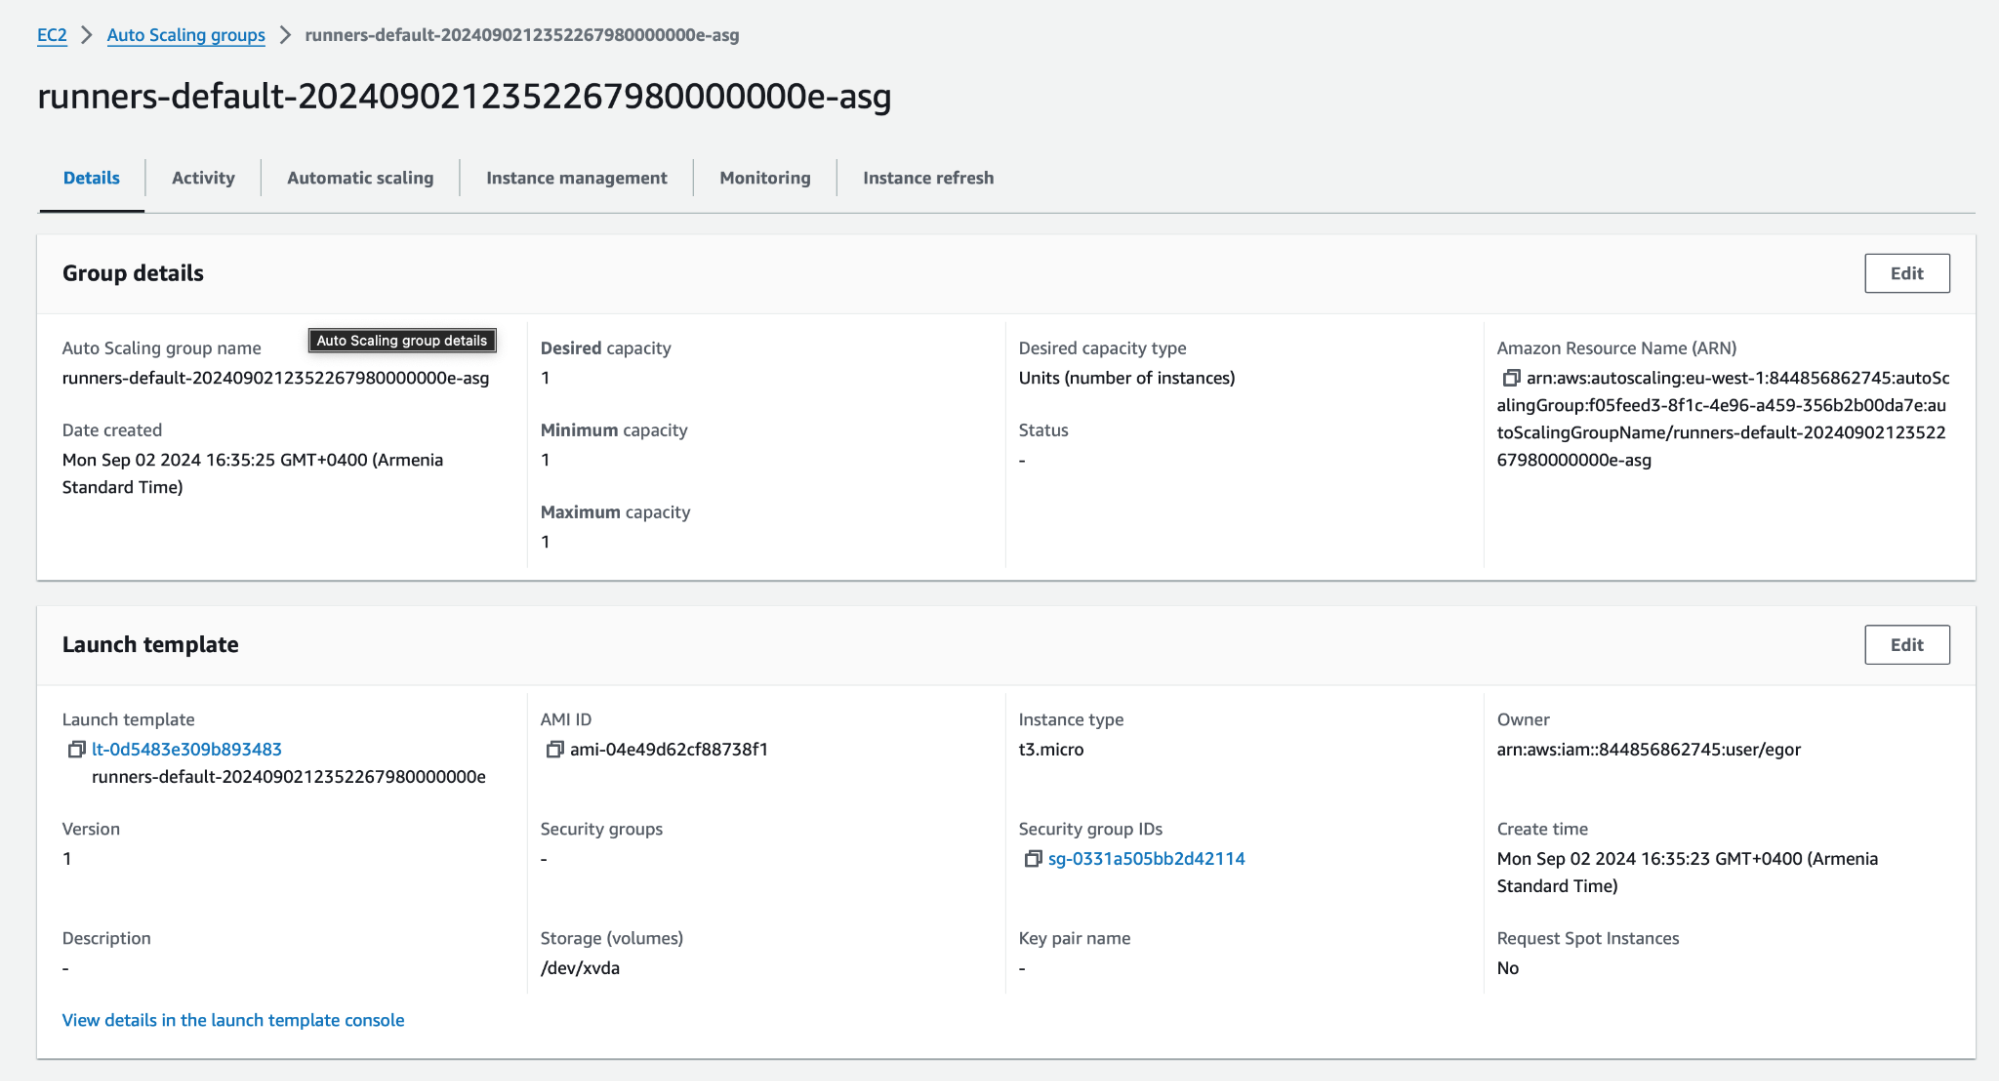
You’ll also notice this ASG has Launch and Termination LifeCycleHooks used to make sure your CI/CD job is not interrupted before it finishes.

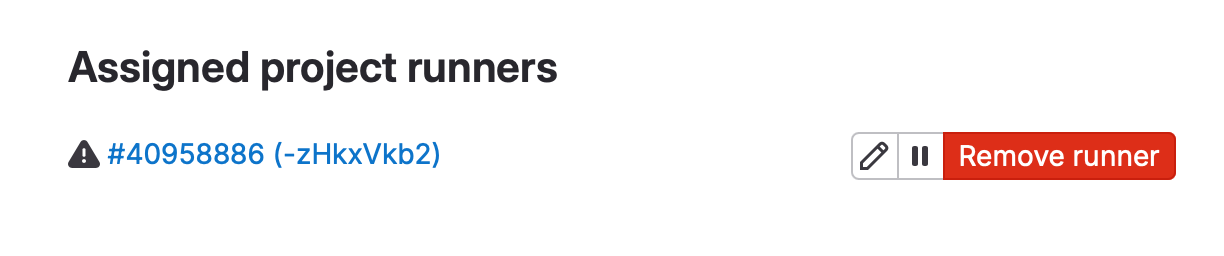
After completing the following steps you should see that a Project Runner was assigned to your GitLab Project. Now, if you start the CI/CD pipeline, a job should be triggered in your AWS AutoScalingGroup
To optimize your workloads the easy way, you can also use a tool like nOps Compute Copilot. Compute Copilot is an intelligent workload provisioner that continuously manages, scales, and optimizes your ASGs/EKS/EC2/Batch to get you the lowest cost with maximum performance.
Compute Copilot makes it easy to save on CI/CD costs with Spot. Fully aware of the changing Spot market, your dynamic usage, and your AWS purchase commitments, Copilot automatically and proactively tunes your configurations to ensure you’re (1) always using the right amount of Spot, and (2) always on the most cost-effective and reliable options available, gracefully moving your workloads onto optimal instances to drastically reduce your rates of termination.
And because optimization is real-time, you can save even for dynamically scaling CI/CD jobs. Find out how much you can save in just 10 minutes by booking a demo today.
2. GitHub Actions with AWS Auto Scaling
Now, let’s talk about the approach to using AWS Auto Scaling with GitHub Actions.
Integration Steps:
- Self-Hosted GitHub Runners on ASGs: Deploy self-hosted GitHub Runners on EC2 instances managed by an ASG.
- Open your GitHib repository
- Navigate to the “Settings” -> “Actions” -> Runners
- Click “New self-hosted runner“ – a Runner configuration page will open
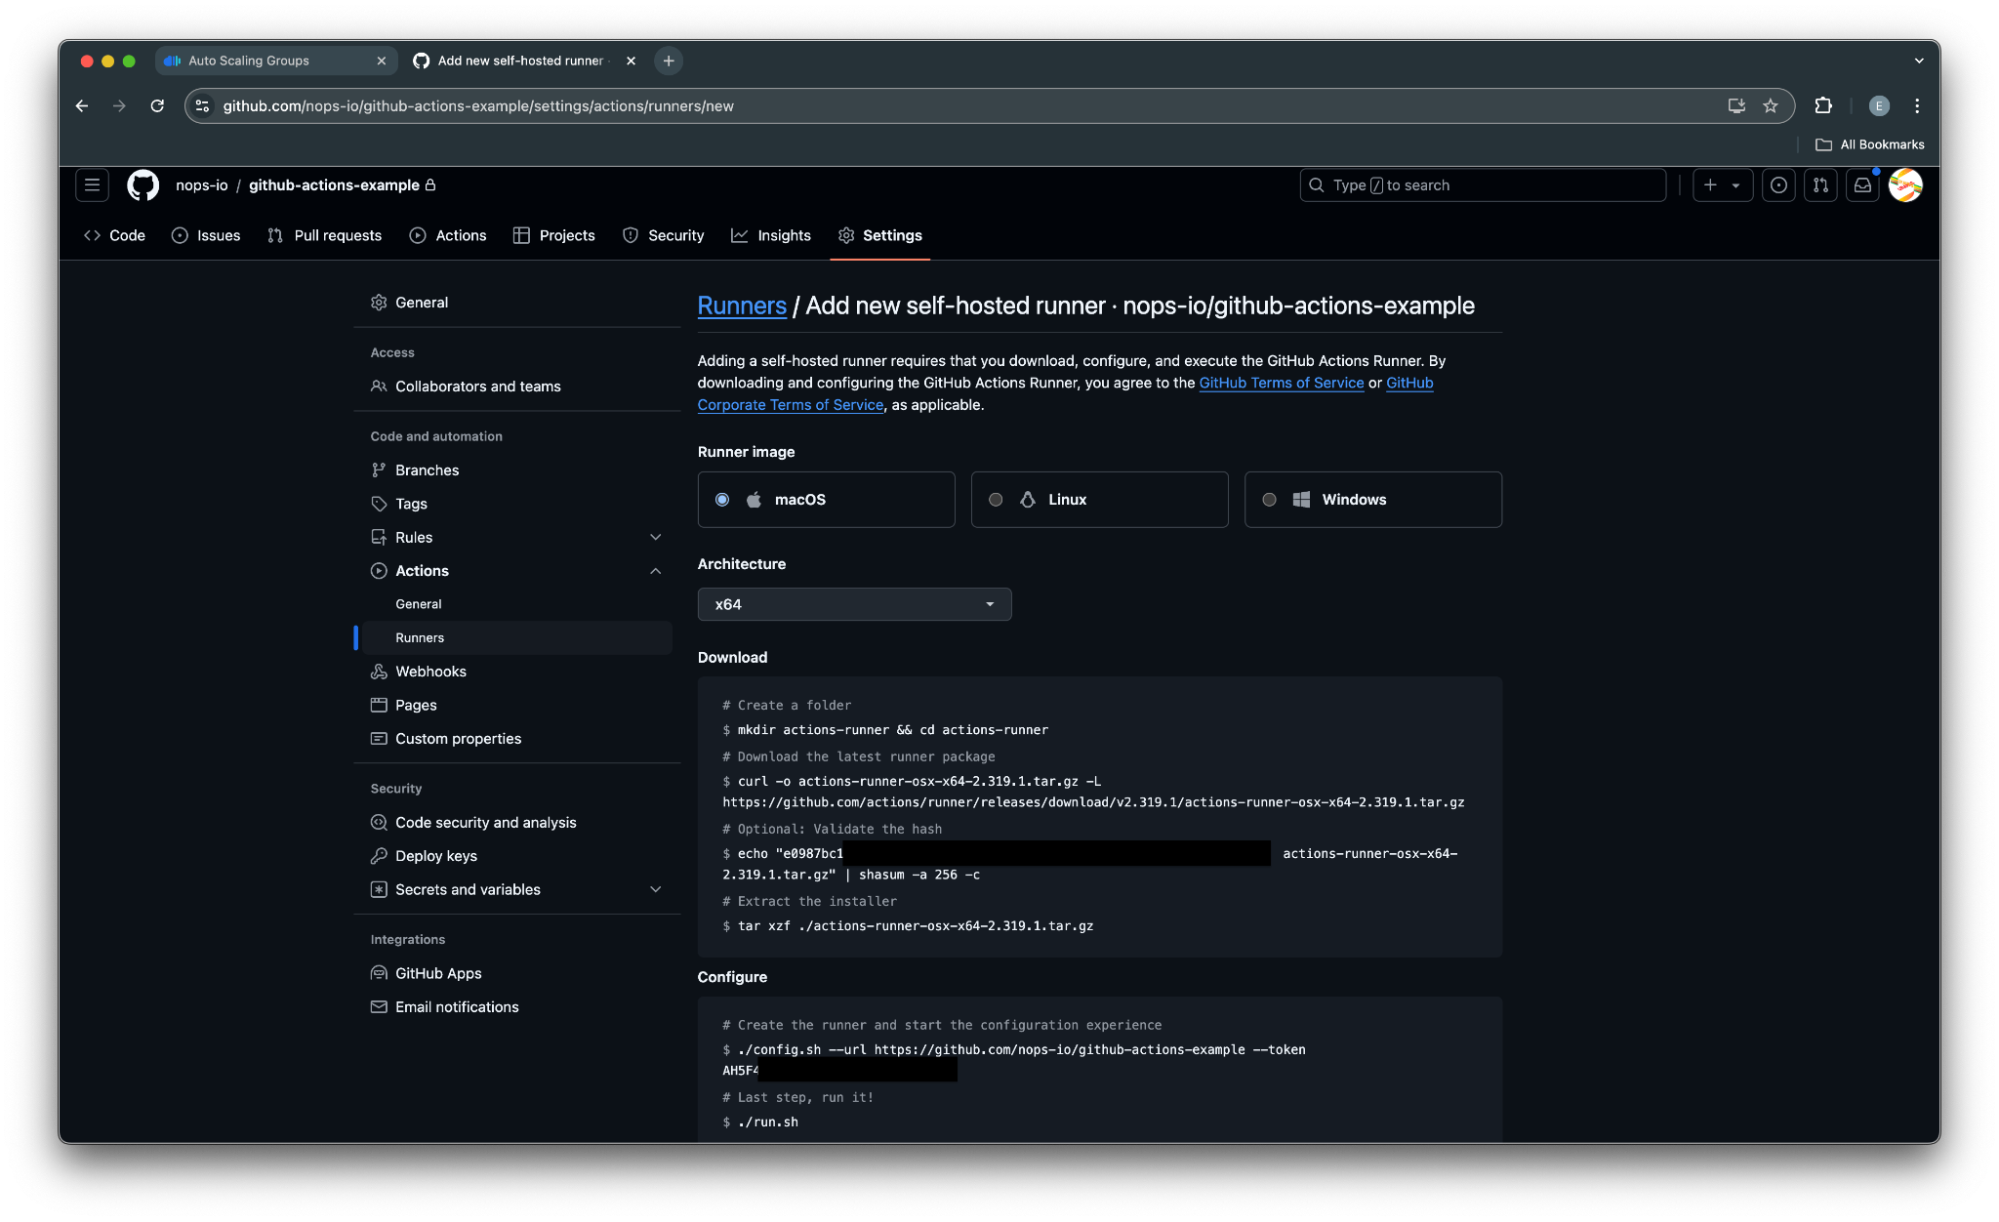
4. After filling the AMI OR and Architecture field, copy the bash commands provided and add them to the EC2 Launch Template User Data. Here’s an example, note that you have to fill your token:
console.log( 'Code is Poetry' );bash #!/bin/bash mkdir actions-runner && cd actions-runner curl -o actions-runner-linux-x64-2.319.1.tar.gz -L https://github.com/actions/runner/releases/download/v2.319.1/actions-runner-linux-x64-2.319.1.tar.gz tar xzf ./actions-runner-linux-x64-2.319.1.tar.gz ./config.sh --url https://github.com/nops-io/github-actions-example --token <YOUR_TOKEN_HERE> ./run.sh2. After updating the EC2 Launch Template with the User Data provided above, scale-out your ASG for it to launch a self-hosted GitHub Runner
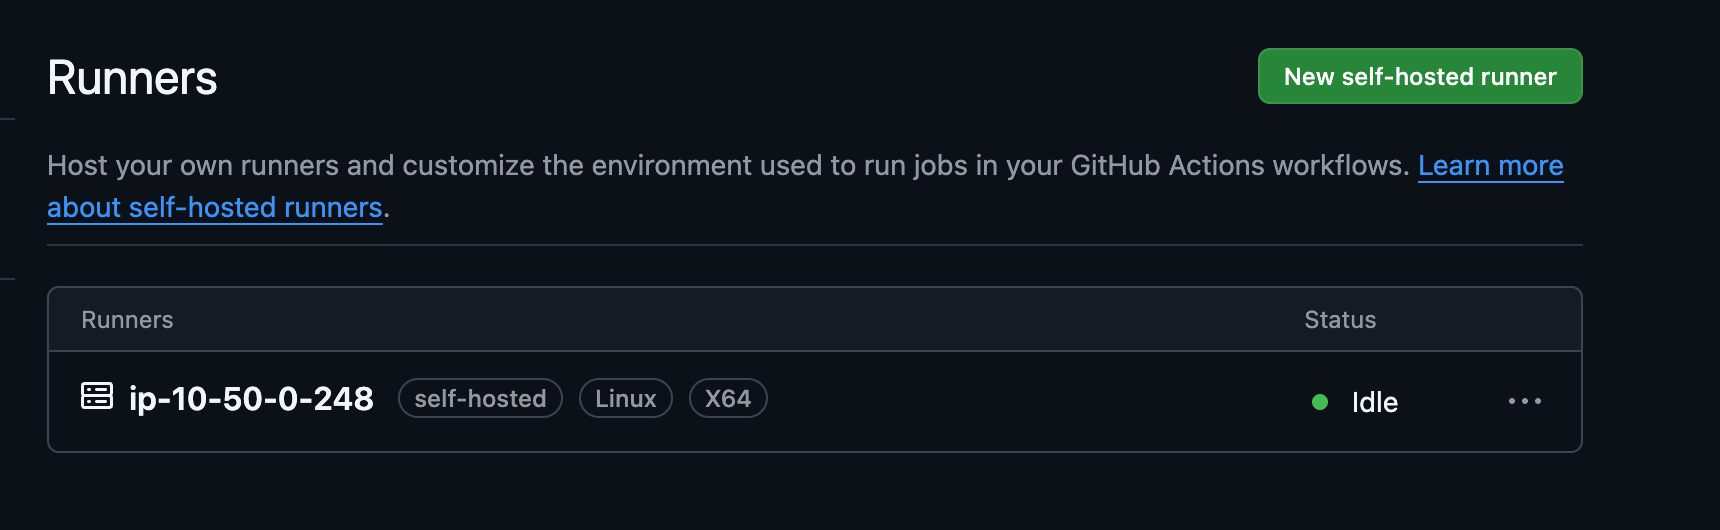
3. Trigger your GitHub Actions CI / CD pipeline to validate the integration
3. Jenkins Jobs with AWS Auto Scaling
Now let’s talk about the Jenkins Jobs autoscaling setup.
Approach:
- Jenkins Agents on Auto Scaling Groups: Deploy Jenkins agents on EC2 instances within an ASG. The ASG can automatically scale the number of Jenkins agents based on workload metrics like CPU usage or the number of pending jobs in Jenkins.
- Spot Fleet Integration: Utilize Spot Fleet requests with Jenkins to add and remove Jenkins agents based on the ASG capacity and cost considerations, using AWS Fleet APIs for scaling.
- Elastic Scaling with Jenkins EC2 Plugin: Use the Jenkins EC2 plugin to automatically provision EC2 instances as Jenkins agents when there are jobs queued. Configure the plugin to manage an ASG for scaling these agents.
Integration Steps:
- Install and configure the EC2 plugin in Jenkins to provision agents on AWS.
- Create an ASG with a Launch Template that includes the Jenkins agent setup script.
- Define scaling policies using CloudWatch metrics (e.g., job queue length) to dynamically adjust the ASG size.
Leveraging Spot Instances reliably for cost savings
Running many simultaneous CI/CD pipelines used by different teams can be expensive — running a CI/CD job for each commit in any of your services can result in hundreds or thousands of jobs monthly.
EC2 Compute expenses can be minimized by using Spot Instances instead of On Demand, for up to 90% discount.
To start using Spot instances in your ASG you’ll need to apply a MixedInstancesPolicy (MIP):
- Navigate to the AWS Dashboard → EC2 → Auto Scaling Groups:
- Enter the ASG details of the ASG used in your CI/CD pipelines
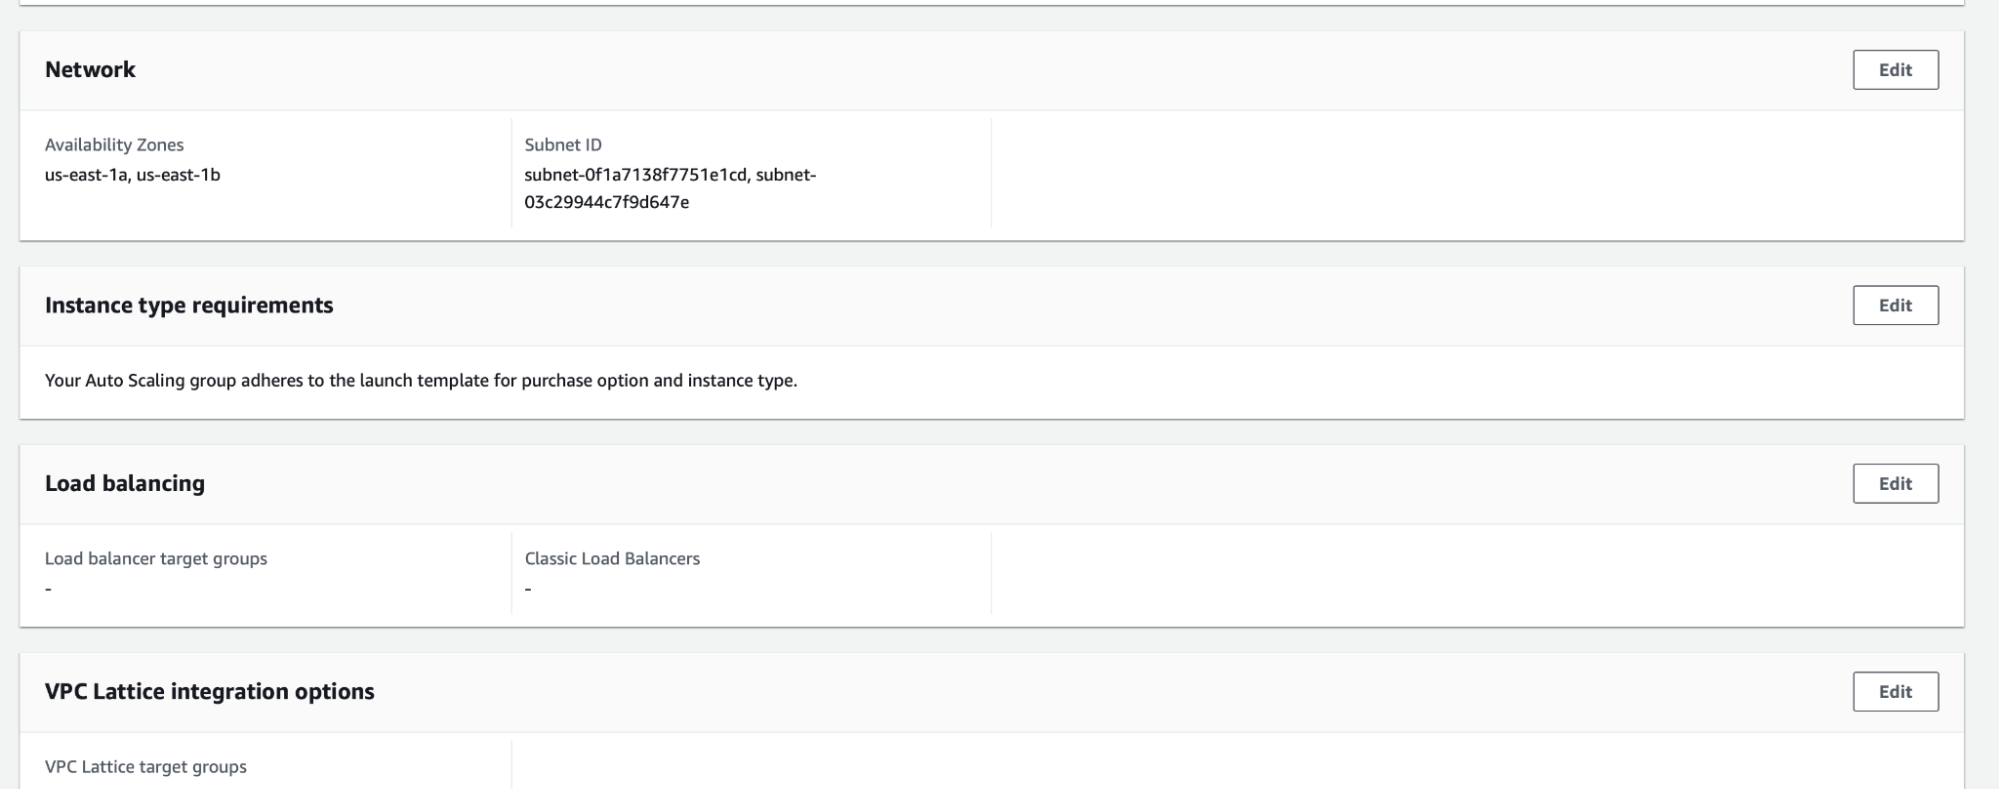
- Click the “Edit” button in the “Instance type requirements” section
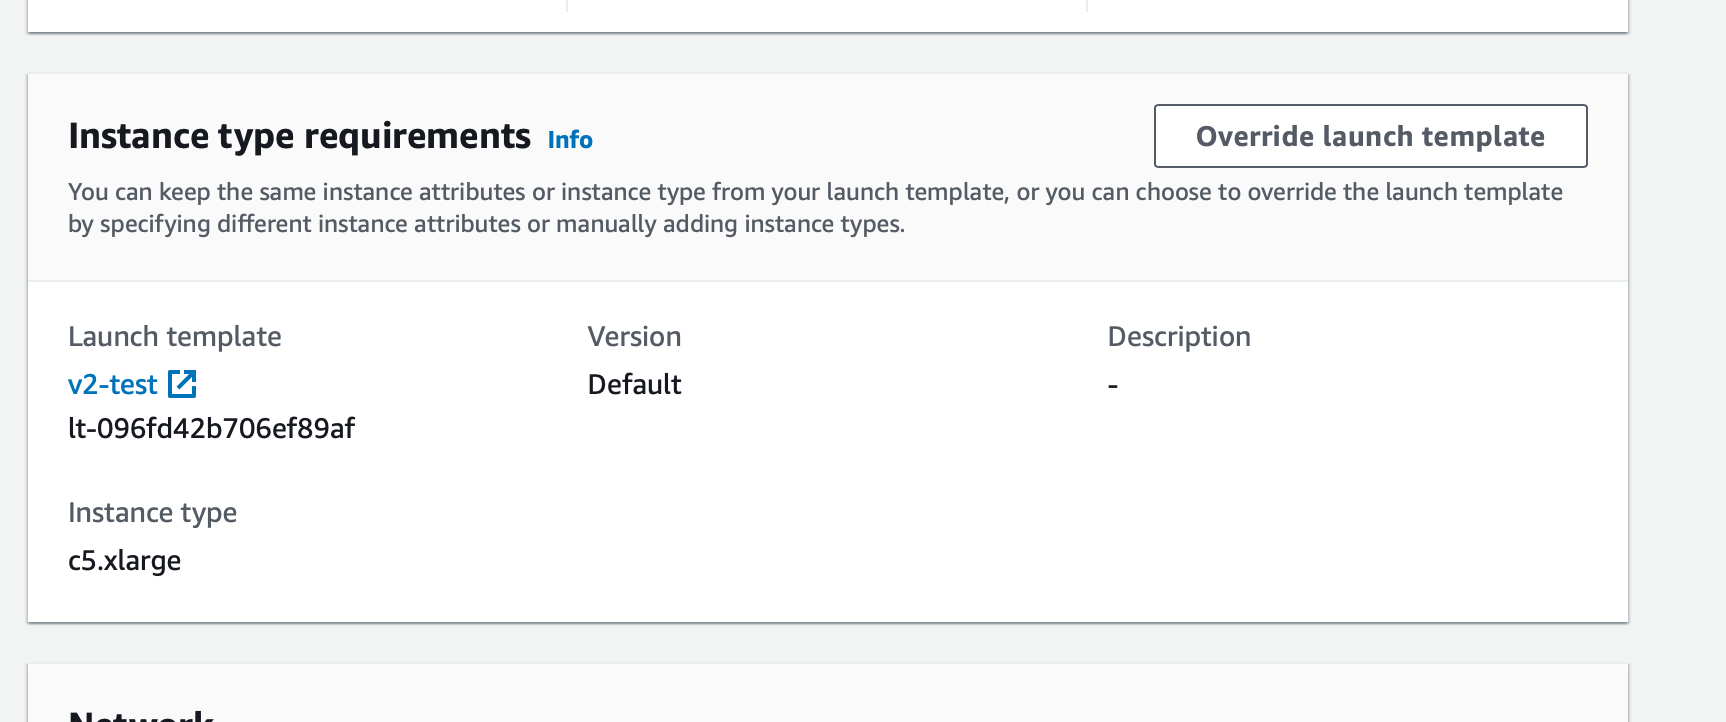
- Click “Override launch template” to create MIP settings
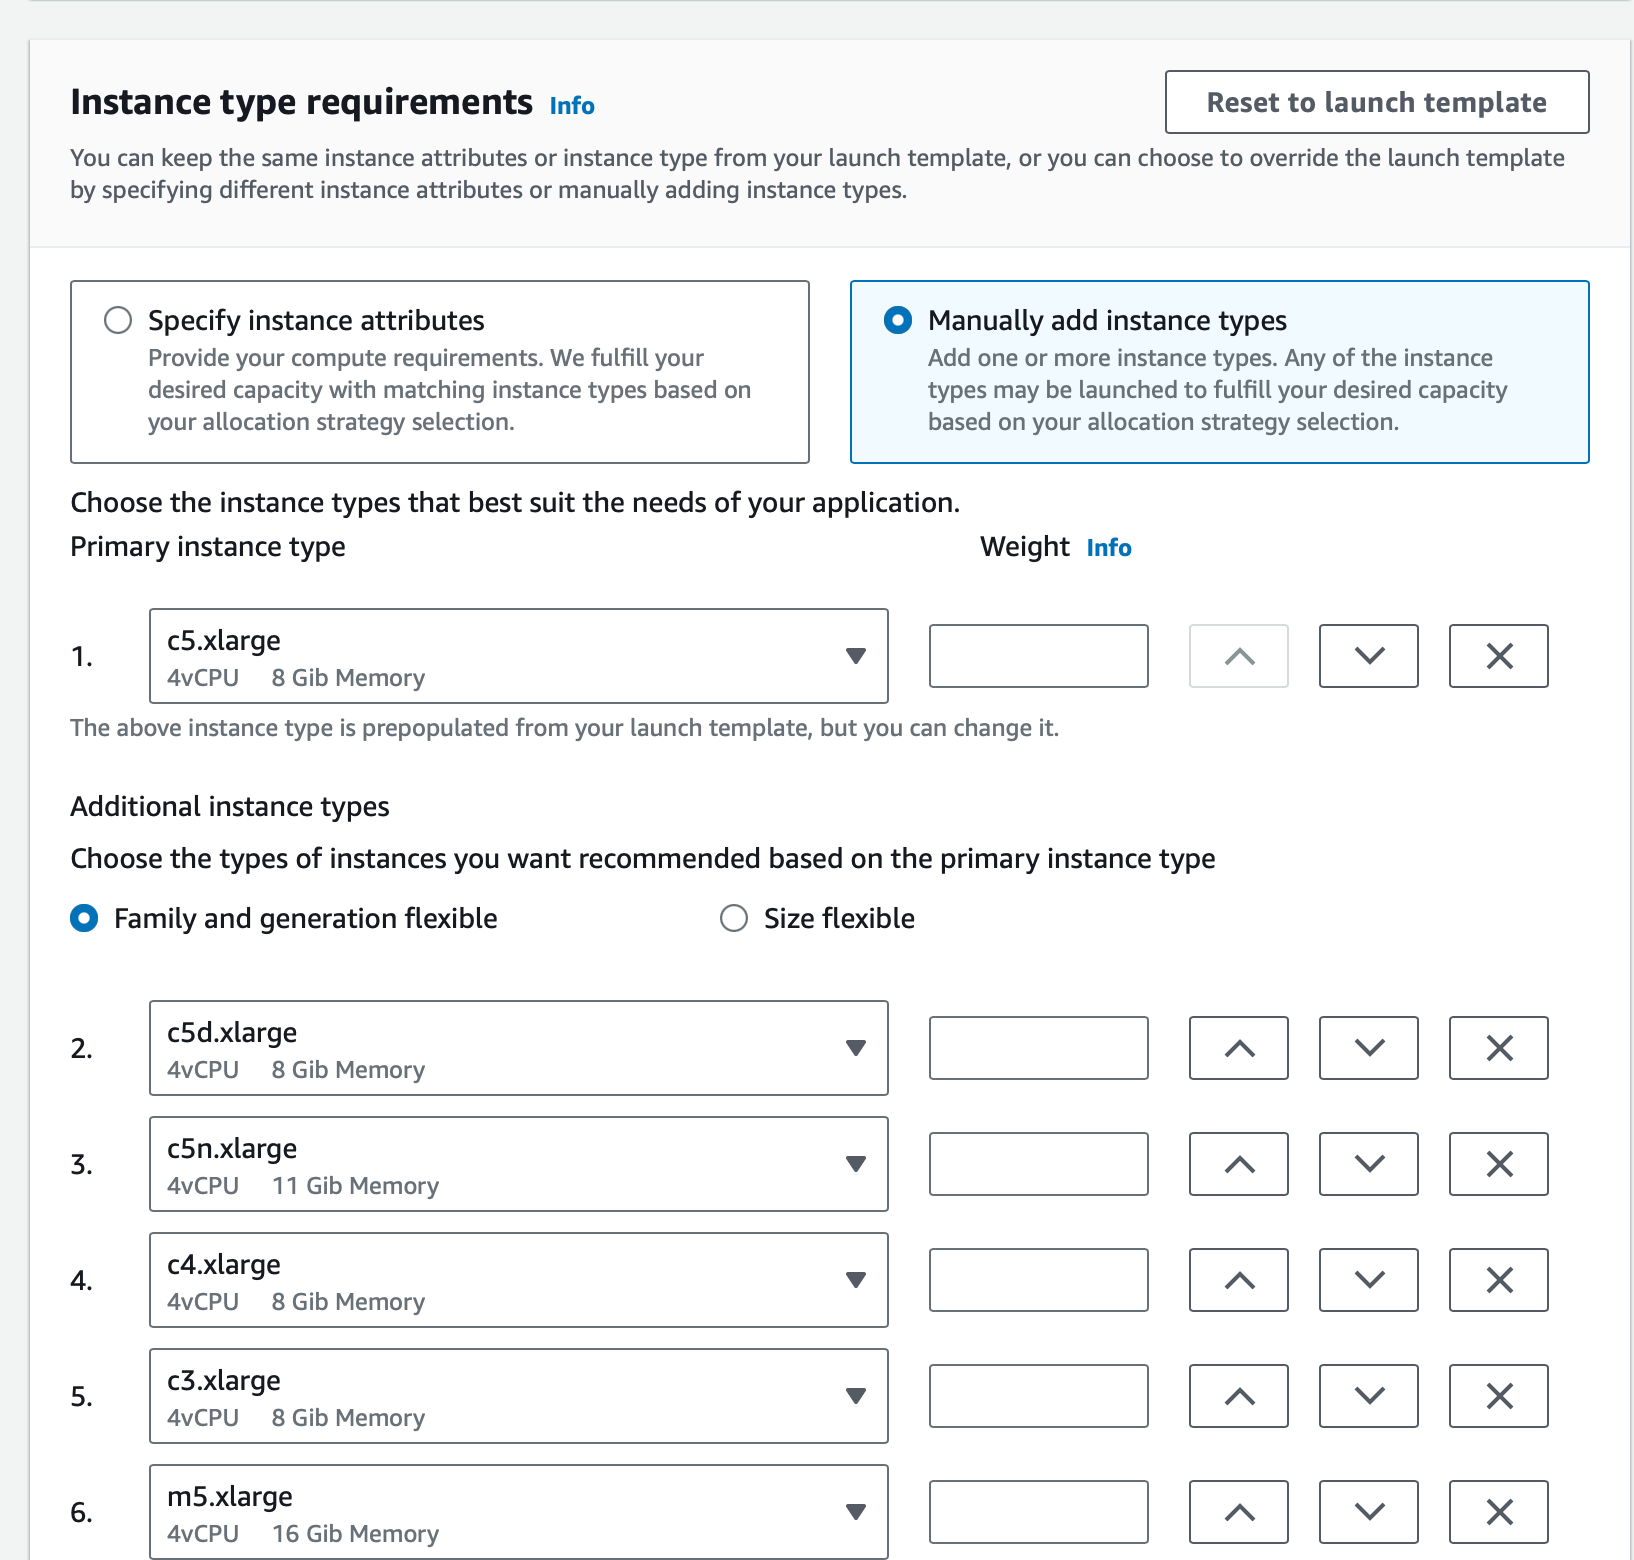
- In the MIP instance requirements section you can either define instance attributes (vCPU count, RAM size and etc) or select the Instance Types manually
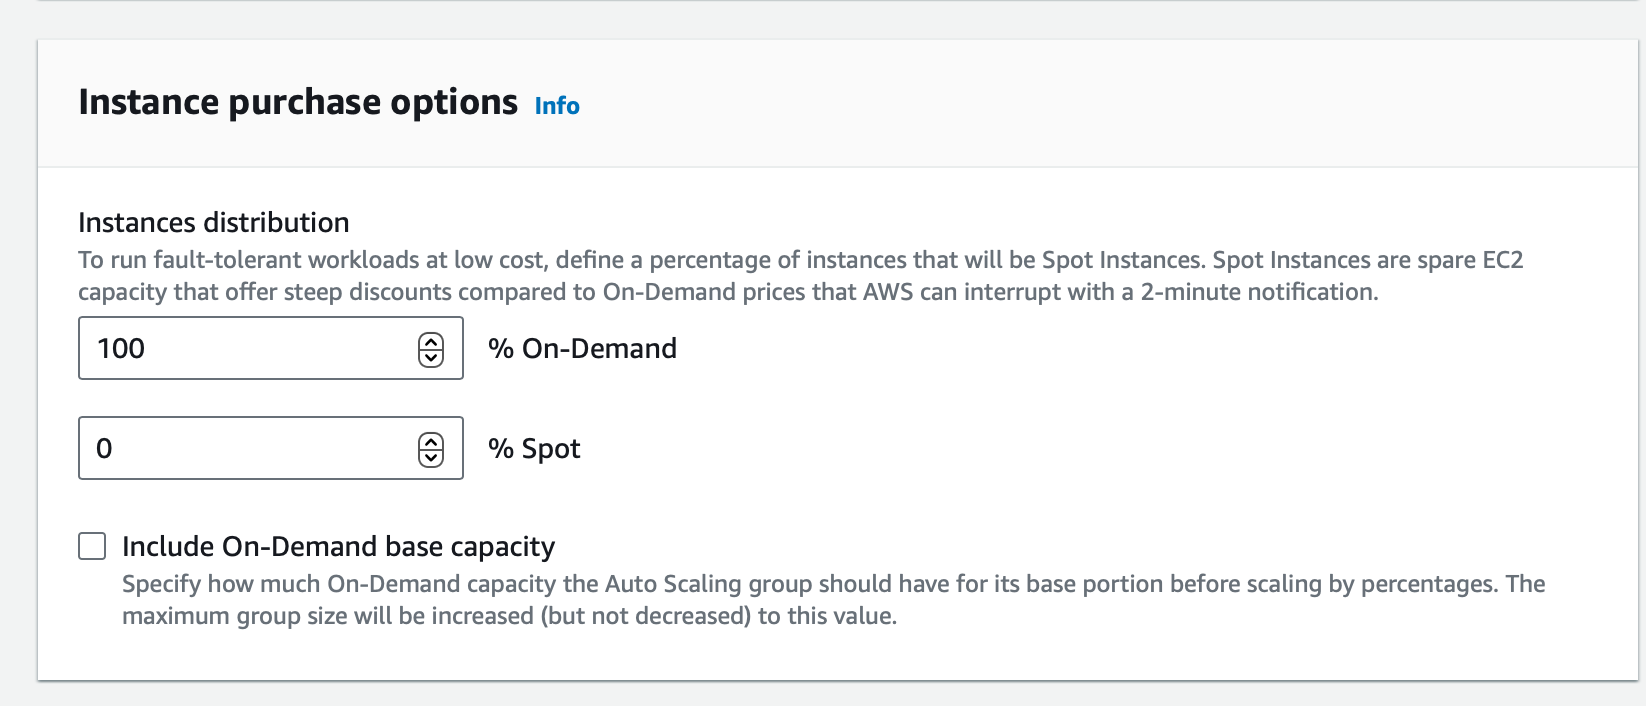
- Below, in the “Instance purchase options” section define the OnDemand to Spot ratio: for the maximum savings use 100% Spot
- Save the updated ASG configuration. Now your ASG is going to launch Spot Instances to process your CI/CD pipeline jobs
Unfortunately, the challenge is that any instance interruption during the job will make your CI/CD pipeline fail and need to be restarted, losing all progress.
All Spot instances will be interrupted by AWS sooner or later. That’s why just using a static Spot Instances pool is not a great idea for CI/CD pipelines despite the huge potential savings —and that’s where nOps Managed ASG comes in.
nOps Managed ASG can help you optimize your Compute Costs in your CI/CD environments by launching reliable Spot Instances in your ASG backed testing environments, giving you up to 90% savings while keeping your job interruptions rate low.
Optimize your cloud costs automatically with nOps
Commitment optimization is often the biggest lever for cloud savings. nOps helps you save 50-60% automatically, with 5-minute setup and no infrastructure changes required.
Maximize savings. nOps continuously layers commitments in small hourly increments to capture 55%+ savings while minimizing overcommitment risk — even for dynamic workloads
Results-based pricing model: Customers typically save ~20% more by switching to nOps — and you pay only when you get better results.
Free Savings Analysis: Quantify exactly how much more you can save for no work on your part. We optimize, and you get the credit.
You can book a free savings analysis to find out how nOps can help you start saving today!
nOps processes over $4 billion in cloud spend and was recently named #1 in G2's cloud cost management category.